In this article:
What is the difference between a scenario template and my own scenario?
Our scenario templates are prebuilt scenarios with preset actions based on various triggers. All you need to do is complete the designated steps. Many marketing strategies are suggested. You could, for example, use the "Birthday" scenario to send your contact an email when their birthday is approaching.
Choosing "Create my own scenario" allows you to use your own creative side! You can create you own scenario from scratch by choosing one of the possible triggers and adding as you go different actions and conditions to complete the scenario.
Build a scenario from a template
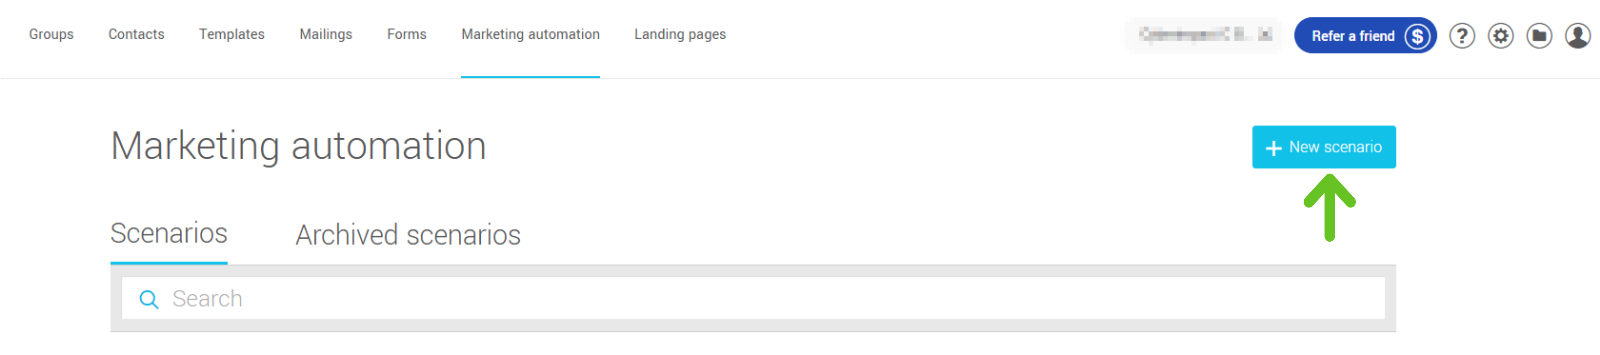
- Go to the Marketing automation menu and click "New scenario".
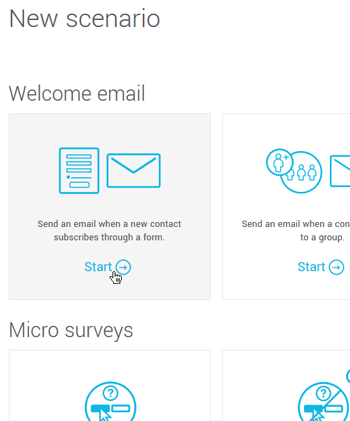
- Scroll through the different scenario templates to find the one that fits your need. Once you've found what you are looking for, click "Start" on that template.
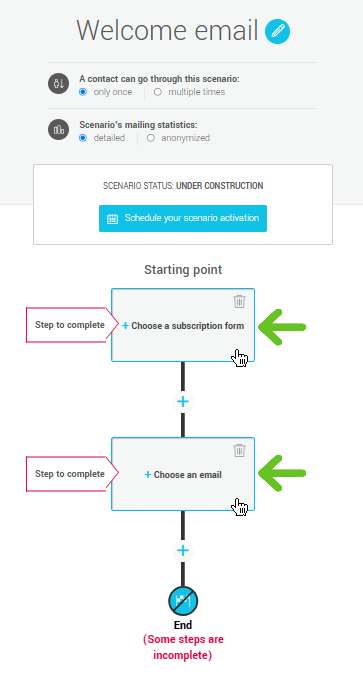
- Click the steps to complete and enter the appropriate information to complete the specified steps.
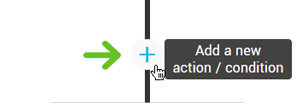
- If needed, you can add (click the Plus sign
 ) more actions/conditions or delete
  the ones you don't want to use. You also can edit
  the trigger settings and the existing actions/conditions in the template.
- Select, at the top of the scenario, the type of tracking for your scenario's statistics.
For more information, see the following pages:
About anonymized sending statistics
Mailing statistics
Choose how many times your contact can go through your scenario. You can choose only once or multiple times.
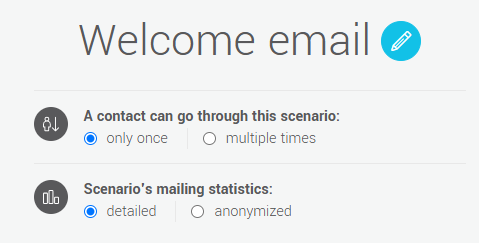
You could, for example, want to restrict the number of times a contact can receive an email after subscribing to your newsletter from one of your forms. When offering a special offer following a subscription you most likely don't want your subscribers to receive the offer multiple times. In that case, you'd select "Only once" so the contact would only go through the scenario once even if they subscribe multiple times with the same email address. - Save your scenario. You'll find the save button on the top right of your screen. Enter a name for your scenario in the appropriate field and click the "Save" button.

- If you've finished setting up your scenario and are ready to activate it, click here for the activation process. If it's not the case, jump to the next step.
- If you've finished setting up your scenario but you're not ready to activate it just yet, you can click the "Quit" button on the top right to exit the scenario builder.
- Save your last changes, if need be.
Build your own scenario
If none of our templates are what you're looking for, you can create your own from the start. You can automate many actions based on various triggers and criteria. Here is how to create your own scenario:
- Go to the Marketing automation menu and click "New scenario".
- Click the "Create my own scenario" button.

- Click the "Add a trigger" zone. Select a trigger from the list appearing on the screen.

- Enter the appropriate information for the trigger chosen.
If you'd like your trigger to be "Subscrption from a form", for example, you'll need to select from the existing forms in your account. Needless to say, you'll need to have created your form prior to starting to build your scenario.
- Click the "plus" sign (add and action/condition) to choose the first action/condition that will follow your trigger. There must be at least one action in your scenario.
Following a subscription through a sign up form generated in your account, you could, for example, send out a welcome email with a promo code to the new subscriber.
- Enter the necessary information pertaining to the action/condition chosen.
The "Send an email", for example, action requires to select a template from the existing templates in your account (you'll see a list of your templates) or to create one specifically for this scenario (you'll see our predrawn templates). Once your template has been chosen, you'll have to set up the mailing settings (subject, preview text, language of the footer...). Afterwards, you'll be able to edit the template if necessary.
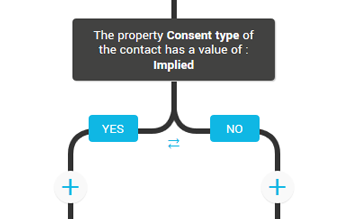
- Add additional actions/conditions if needed. There is no maximum to the number of actions and conditions you can add in a scenario. Keep in mind, however, that the more you add, the more complex your scenario becomes.
Note : Additional options are available following a "Send email" action. These conditions are "Opened an email" and "Clicked a link". They are linked to the "send email" action above them in your scenario. To add these conditions click the "Plus" sign following the "Send email" action.
- Select the type of tracking for your scenario's statistics.
For more information, see the following pages:
About anonymized sending statistics
Mailing statistics
Choose how many times your contacts will be allowed to go through your scenario: Only once or multiple times.
.png)
You could, for example, want to restrict the number of times a contact can receive an email after subscribing to your newsletter from one of your forms. When offering a special offer following a subscription you most likely don't want your subscribers to receive the offer multiple times. In that case, you'd select "Only once" so the contact would only go through the scenario once even if they subscribe multiple times with the same email address.
- Save your scenario. You'll find the save button on the top right of your screen. Enter a name for your scenario in the appropriate field and click the "Save" button.
- If you've finished setting up your scenario and are ready to activate it, click here for the activation process. If it's not the case, jump to the next step.
- If you've finished setting up your scenario but you're not ready to activate it just yet, you can click the "Quit" button on the top right to exit the scenario builder.
- Save last minute changes, if need be.
See also :